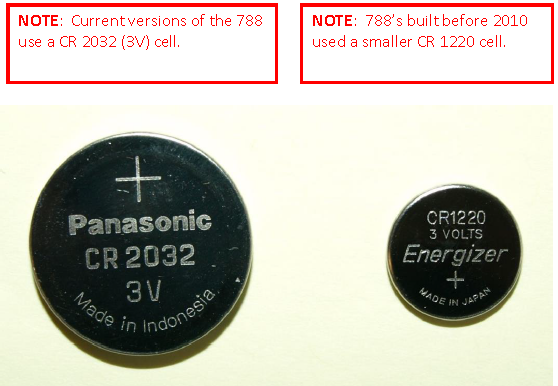
788T Time-of-Day Battery Replacement
Disassembly
- Observe standard practices and precautions when working with electronic assemblies.
- Work in an ESD safe environment. Ground yourself, tools and equipment to prevent damage from static discharge.
- Remove and/or disconnect power sources from equipment such as AC Adapters and batteries. Allow circuits time to drain any stored charges.
- Disconnect inputs and outputs to prevent connector damage during disassembly and assembly.
- Use proper, well-maintained tools.
Note: After servicing the unit, re-assembly should be aided by scrolling through these slides in reverse order to be certain that no small items are missed.
Time-of-Day Battery Replacement
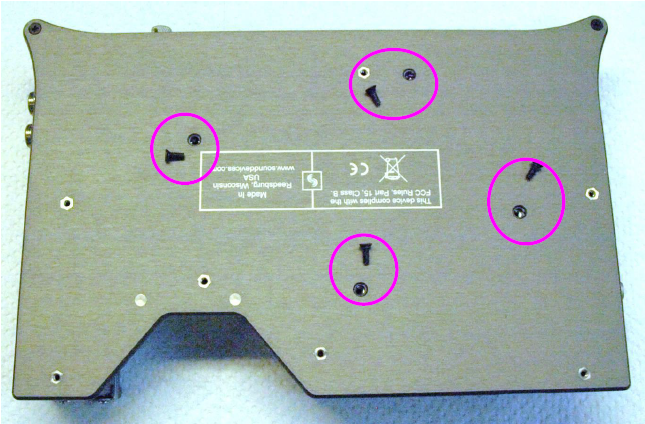
1. Remove two golf tee screws (P/N 1141) and seven long panel to panel screws (P/N 1549).
2. Carefully turn the unit upside down while holding the top panel securely in place.
3. Remove four flat head screws (P/N 1141).
4. Lift the bottom panel off. The all-around assembly fits snugly in a gasket channel cut into the bottom panel. With the screws removed, some force may still be required to separate the panel from the all-around. Do not pry the panel or all-around assembly with any tool. Damage to the mating surfaces will prevent proper reassembly and may result in RF leakage.
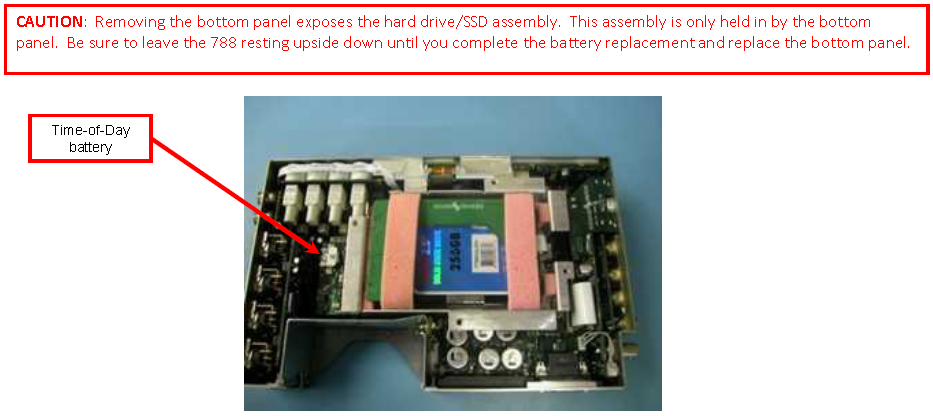
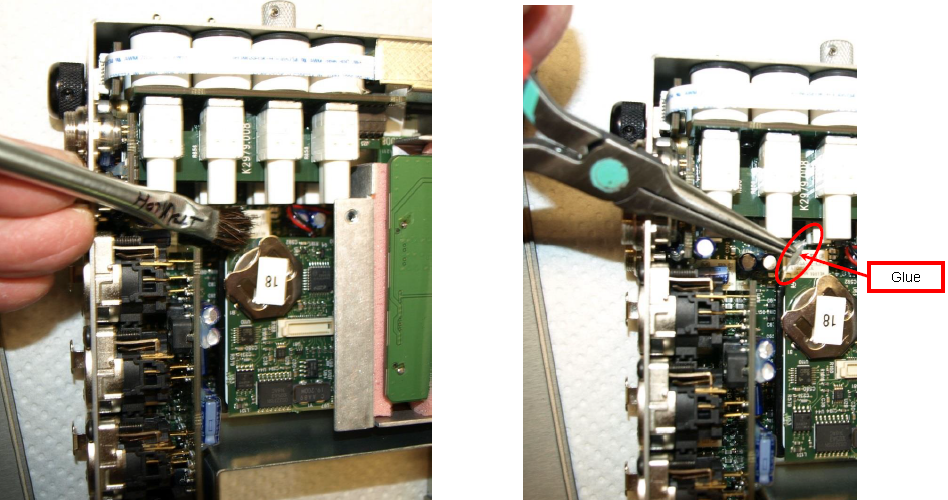
5. The TOD coin cell battery is probably secured in-place with a dab of hot melt glue. Brushing on a bit of isopropyl alcohol will make it easy to remove the glue by grasping it with a longnose plier.
Note: The TOD coin cell battery is not easily accessible without further disassembly of the 788 but that should be avoided.
6.Start by pushing on the coin cell through an open corner of the holder using an insulated stick, such as the handle of a cotton swab.
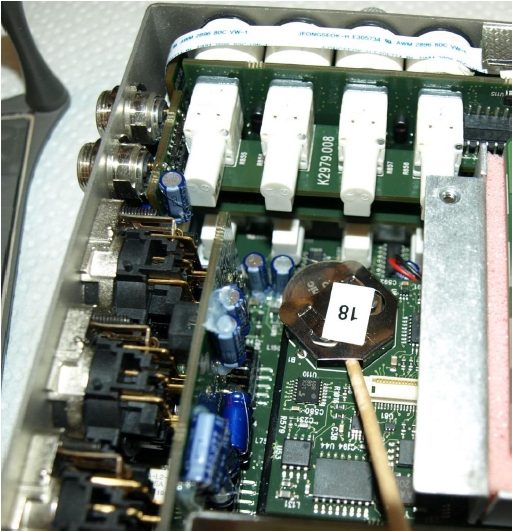
7.Using a strong and sticky tape, such as electrical or duct tape, stick one end of it to the exposed area of the coin cell and then pull to remove the coin cell from the holder.

8.Carefully slide the new coin cell into the holder being certain the correct side of the cell is facing up.
9. Reassemble the 788T, by following the previous steps 4-1 in reverse order.